


How to create a Ticketing System for Customer Support
In this post we will explain step by step how to create a Ticketing System for Incident Management and Customer Support using Docuo Workflow Software.
As I commented in the previous post, for any Customer Service department it is very important to have a ticketing system that allows keeping track of the incidents, queries and suggestions of our customers and knowing what state they are in. This software will allow you to not forget any of the incidents or queries created by your clients and keep the work in order.
Step 1: Get an Docuo repository
To start with, you will need an Docuo repository. If you are already a customer then you can use your own repo, if you are not a customer yet, you can create a free one here:

Once you have your repository ready, log in your account using Docuo for Windows and you will be ready to follow next steps.
Step 2: Create a Document Category for Support Tickets
The first thing to do is create a category for the Support Tickets. To do this, start the desktop application with your administrator account. Now go to the purple tree (categories), press the cog button at the bottom left (Category Manager) and then click on “new category”.
You will see the first step of the category manager in which we will define the name and code of the same (Support Ticket):

Step 3: Create Metadata Fields to Store Ticket info
Then we move on to the “Fields” step and create the necessary fields for our ticketing system:
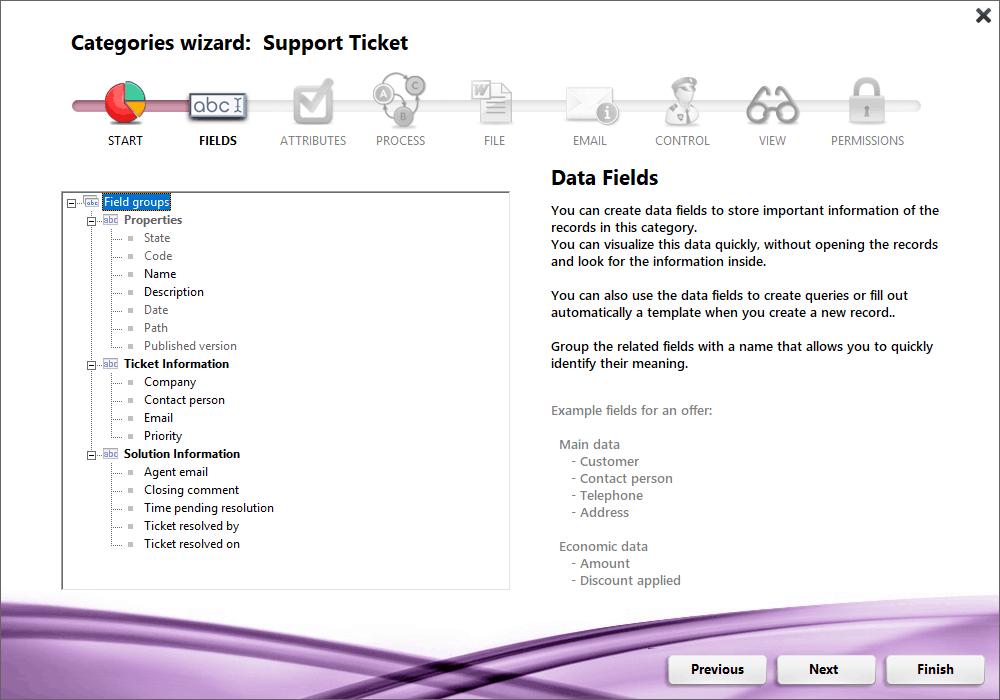
The mail field is a text type but we configure it so that only emails can be inserted. The Priority field is a drop-down type field with the values “Normal” or “High”. The field “Closing comment” is multiline to be able to enter paragraphs. Regarding the fields “Time pending resolution” and “Ticket resolved by”, they are fields of type process information. We will return to them later.
Step 4: Setup a Custom Workflow for your Support Tickets
Now click on the step “Process” and create a simple workflow that will follow each ticket that we create:
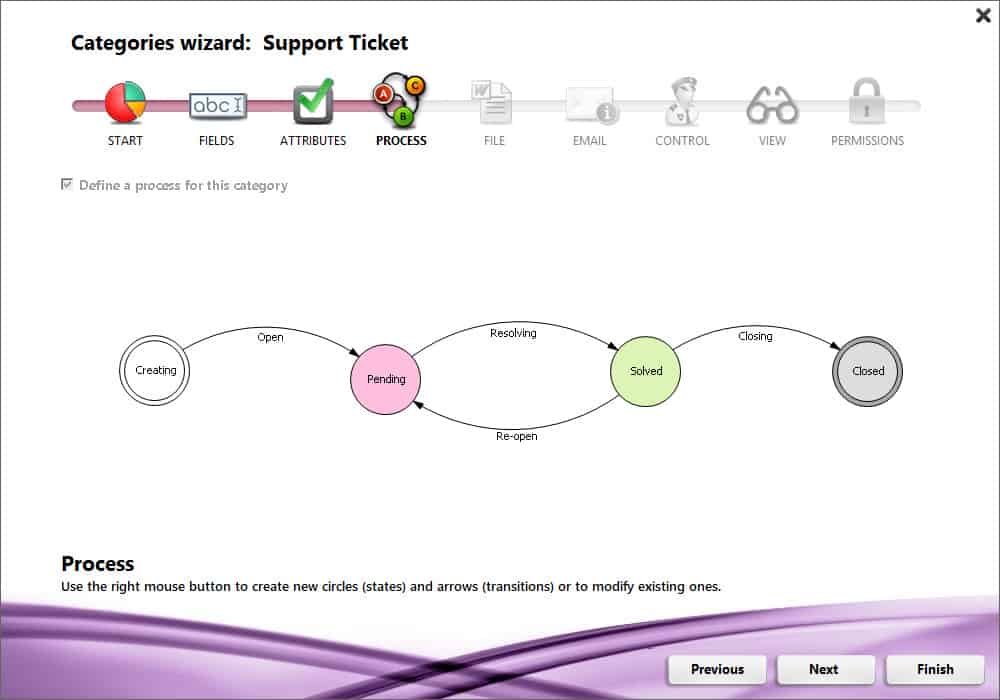
Notice how I created the transitions (arrows) and the states (circles).
Now I can go back to the fields and say that the field “Time pending resolution” shows the time that the ticket has spent in the “Pending” status
The “Ticket solved by” and “Ticket solved on” fields are automatically filled with the user and the date in which the ticked changed its status through the “Resolving” transition.
Step 5: Tell Docuo this Document Category is a pure Workflow (no main file)
Now we go to the “File” step and we check that our category is configured so it des not have a main file.
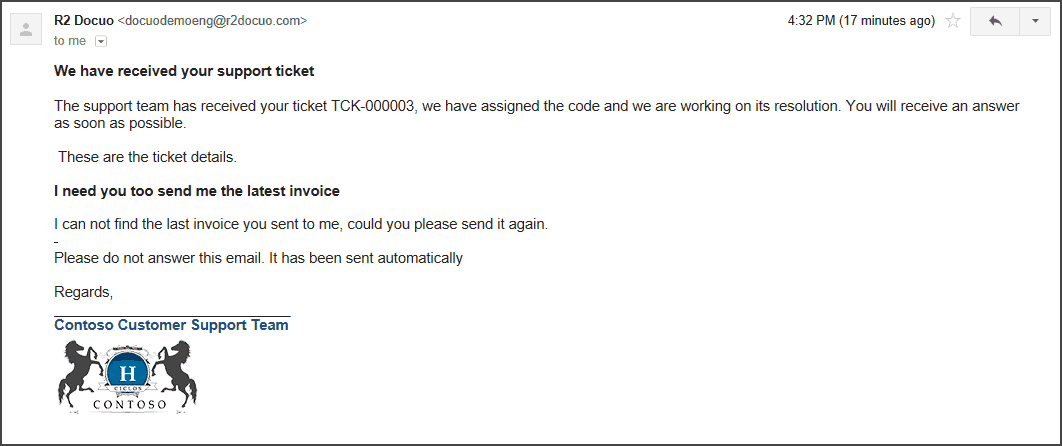
Step 6: Create Email Templates that will be automatically sent at the right point of your workflow
Then we go to the email step and create the automatic mails that we need to send:
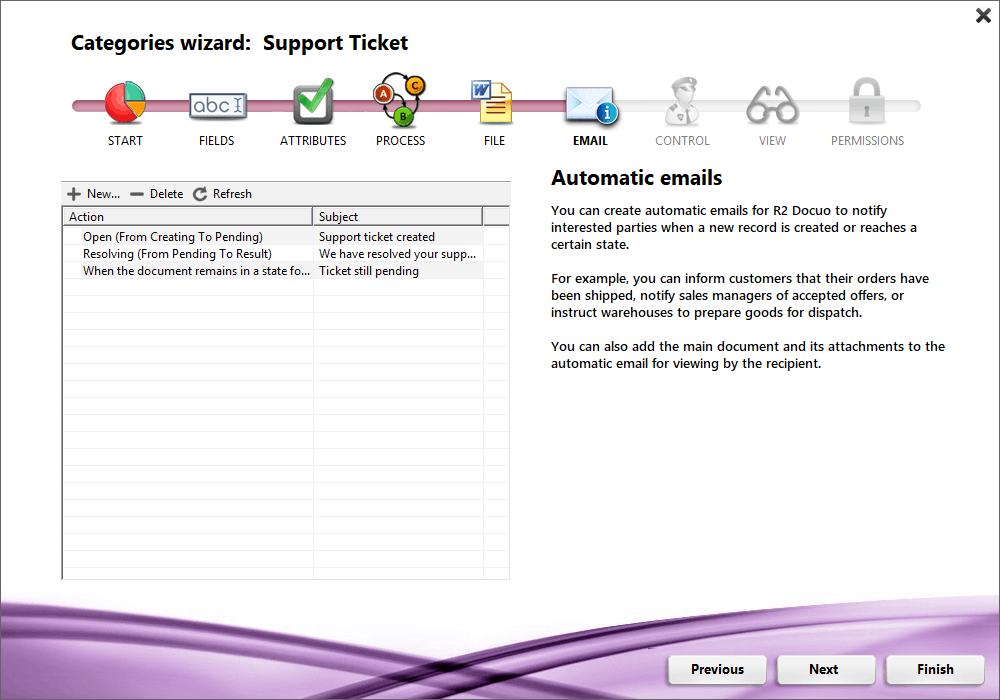
I have created an email that is sent at the creation of the ticket, another that is sent when it is resolved and another that notifies us when a ticket is in pending for a long time.
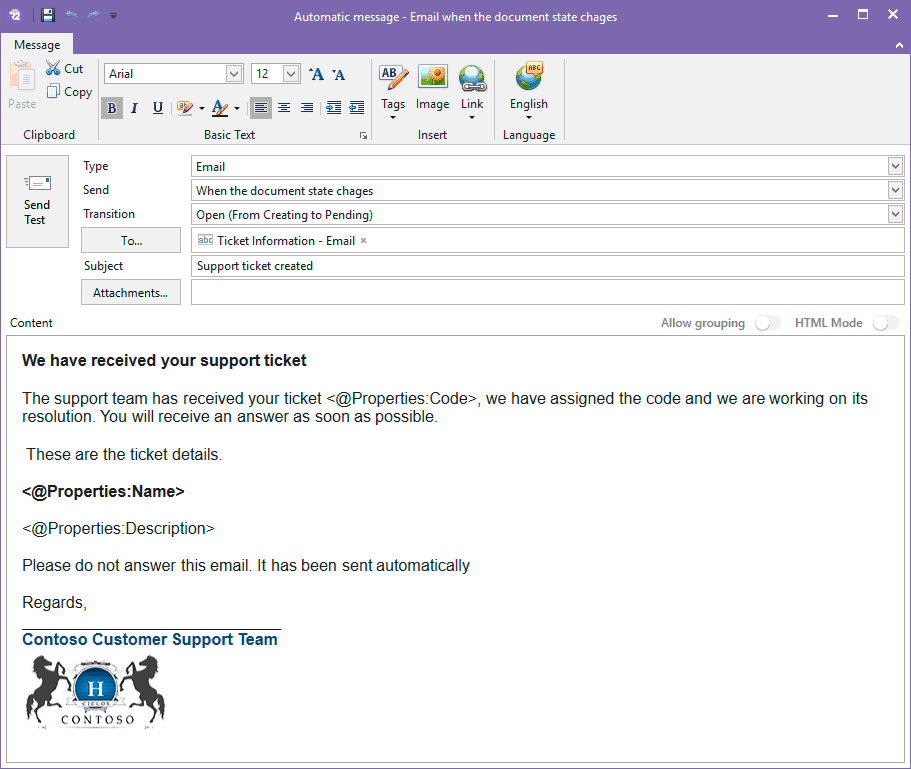
Automatic email creation in Docuo is really easy, w are creating an email template but it is really similar to compose a new email in Microsoft Outlook, This is a sample of the automatic email creation screen for the first email (the one sent during ticket creation):
Step 7: It is done, start collecting Support Tickets
Our ticketing system is ready!
If you need more help to create categories in Docuo you can consult the user manual.
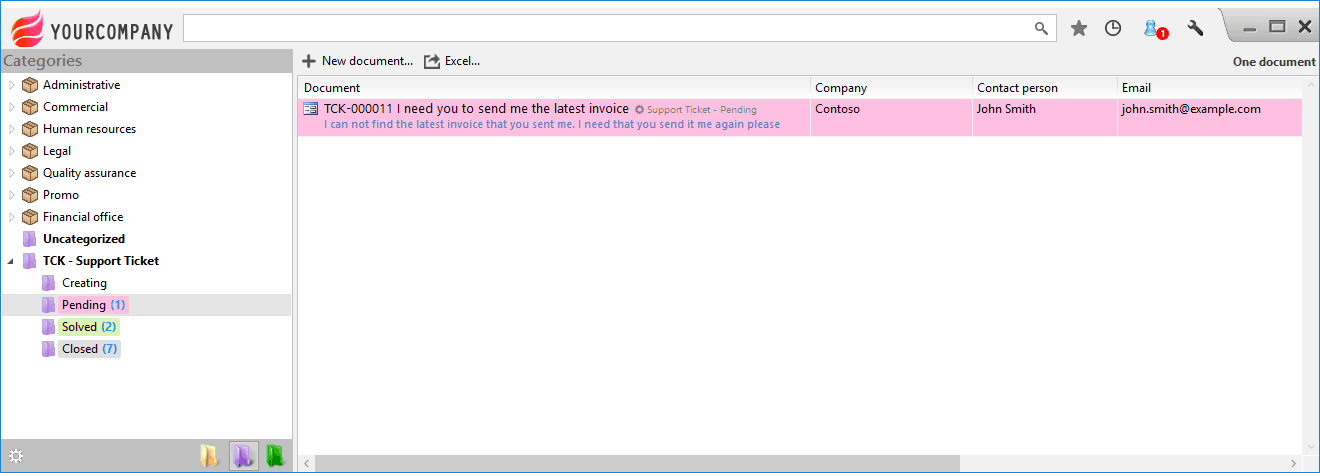
Once the category has been created, we begin to create the records according to the requests of the clients.
For each request, query, incident, suggestion, etc. we create a ticket.
When completing the fields all the information is stored in the ticket window and is accessible with a single click.
Once the ticket has been created, we advance to the corresponding state.
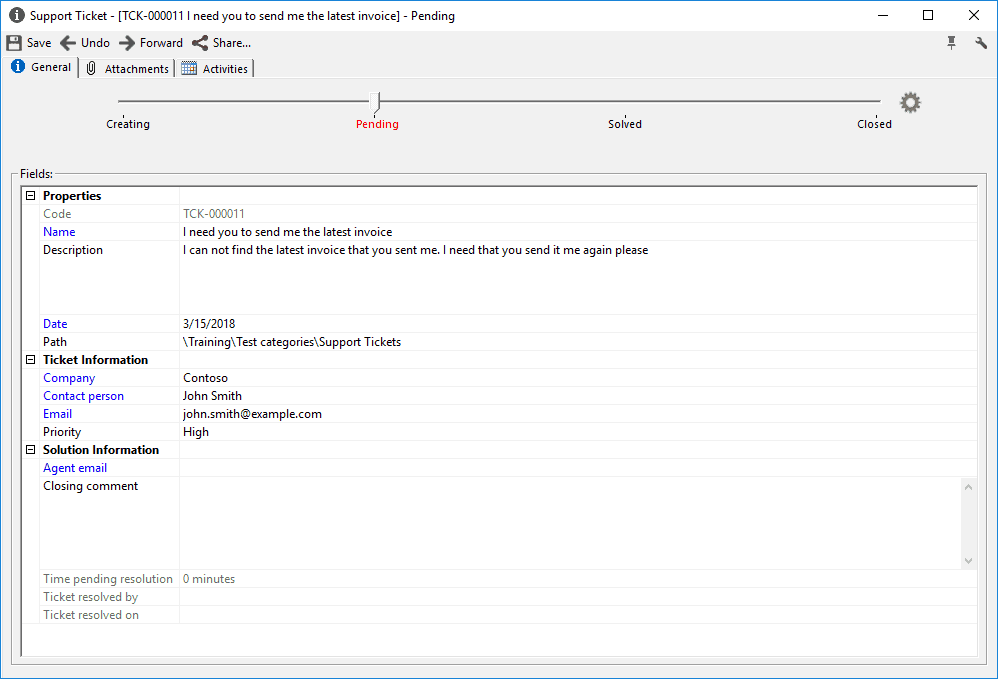
When the ticket advances status, automatic emails are generated as they have been configured in the category.
Both the customer and the support team are informed of the opening of the ticket and the resolution.
As new tickets are being created or closing old ones, the information of the ticket number in each state is updated.
At all times you can know how many tickets are pending resolution or how many have been closed.
With a category as simple as this you can optimize management times, automate opening and closing responses, control the time that resolution takes and view the total number of managed tickets.
This process is just an example of the type of categories that can be created to optimize the management of customer service departments, you can create any type of category that you consider necessary.
Do you find it difficult? Let’s make it even easier. Here I leave the category “Support ticket” for download, unzip (is a ZIP file) and import into your repositories, if you want to try what it would be like to take the ticketing system of your company from Docuo:
Remember that the import is done from the category manager (purple tree, cog button at the bottom left), by pressing the import option.
Step 8: Next steps: Collecting Tickets from Responsive Web Forms
In this tutorial I have shown you how to create the category to manage the tickets, but we still need to create a web form so that any customer can create new support tickets using a browser. You can learn more about that in this other Docuo web forms tutorial. Make sure you have followed all the steps here before you start with the forms and you will see how everything fits together.
I hope you like it!
Conchi Liébana
